Photographing your stall for social media
Use natural light, a tidy background and a phone held at product height. Take one wide shot of the whole stall and a few close-ups of your best items, then crop, brighten and post. Ask before you photograph customers.
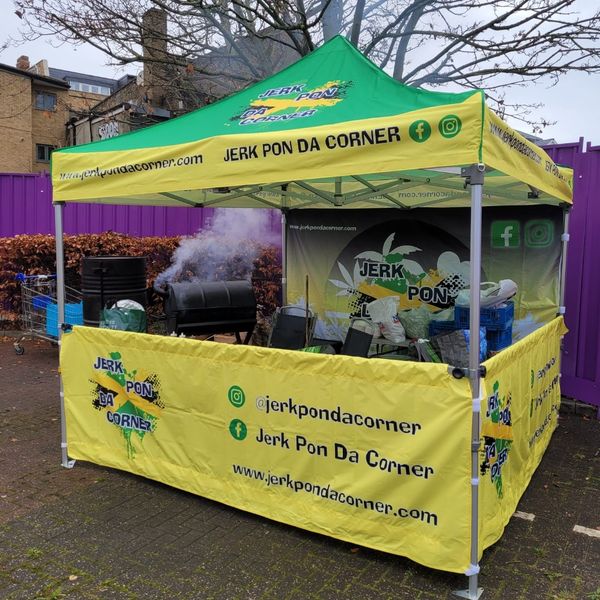
Use good light
Natural daylight gives the most even colour. Shoot early in the day, when the light is softer, and turn so the light falls on the front of your products. Avoid strong sun behind the product, which leaves it dark. Under a gazebo, step to the open side of the stall for the best light. Cloudy days give soft, even light, which suits most products. If the pitch is dim, a small portable light can help.
Tidy the scene
- Clear boxes, bags and rubbish from the frame.
- Straighten the tablecloth and price signs.
- Group products by type and colour.
- Wipe the table and check for fingerprints on glass or shiny items.
- Add height with stands or crates so the display has depth.
Get the angles right
Take a wide shot that shows the whole stall and your sign. Then move closer for each hero product, and hold the phone level with the item so lines look straight. A close-up that shows texture and detail often performs well, and a shot with a hand holding or using the product shows scale. Still life photography has a long tradition of arranging objects for the camera, and the same care helps here. Take several versions of each shot, because small changes in angle and spacing can improve the result.
Show people and process
Photos of you at work attract attention. Ask customers if they are happy to appear and wait for a yes before you post. Show the making, packing or serving of your product to give followers a reason to visit. A short clip of a busy stall, with permission from anyone who appears, shows the atmosphere better than a still photo.
Edit quickly
- Crop to remove clutter at the edges.
- Straighten the horizon or table edge.
- Lift brightness slightly if the image looks dark.
- Keep the colours close to real life, so customers get what they see. Heavy filters can make products look different from the real thing.
- Save a copy without text or filters for later use.
Create a shot list
Before each event write a short list of pictures to take, such as the stall front, the best seller, the pricing board, a close-up of the newest product and a team photo. Tick them off during quiet moments. A list stops you finishing the day without a usable picture. Keep a few spare minutes for pictures of the setting, such as the market atmosphere or a well-known landmark nearby, because they help followers place the event.
Add a caption that helps
Say what the product is, where you are and when. Add your next event and a clear way to find you. Our guide to social media for event traders covers a posting routine, and branding your market stall helps keep the look consistent.
Frequently asked questions
Do I need a professional camera to photograph my stall?
A recent phone is enough. Clean the lens, use good light and keep the phone steady.
Can I photograph customers at my stall?
Ask first. Post a photo of a person only when they agree, and remove it if they change their mind.
What time of day is best for photos?
Early morning and late afternoon give softer light, and many traders photograph the stall as soon as it is set up.
How many photos should I take at each event?
Take a few of the whole stall and several close-ups of key products. Choose the best and keep the rest for later posts.
Gazebos built for regular pitches
Once a pitch is confirmed, the stall needs to fit it. Gala Tent makes market stall gazebos for traders who set up week after week.
Useful pages on our sister sites
Event Industry Trader is published by Gala Tent. These pages from Gala Tent and the wider Gala group go further on the kit, branding and payments covered here.
Where to check the rules
Rules vary by council and by event. Confirm requirements with the organiser and the relevant authority before you act.